
Article: RECIPE | CLASSIC BILTONG
RECIPE | CLASSIC BILTONG
Pull up a chair. The fire's warm, and you're in good company.
Long before there were supermarkets, refrigerators or even farms, there was meat, salt, smoke, wind and time.
Our ancestors understood something that most of us have largely forgotten: getting food was only half the job. Keeping it was the other half.
For prehistoric hunter-gatherers, a successful hunt could provide an extraordinary quantity of food in one moment. But without refrigeration, fresh meat was also perishable. Drying was one of the simplest answers. Cut meat thin enough, expose it to dry moving air — sometimes alongside smoke, salt where it was available, or other preservation methods — and moisture could be removed sufficiently to extend its useful life.
Different peoples developed their own versions across the world. Meat was dried in the sun, over fires, in cold dry air and in the wind. The names, techniques and seasonings came much later.
The principle was ancient:
Take good meat. Remove moisture. Preserve the harvest. Carry it with you.
Biltong belongs to that much older human story.
Before It Was Called Biltong
The biltong we recognise today developed in southern Africa.
The word itself comes from Dutch/Afrikaans roots — bil, referring to the buttock or hindquarter, and tong, meaning strip or tongue. But the idea behind it long predates the name.
Indigenous peoples of southern Africa were preserving meat before European settlement. Later, Dutch settlers at the Cape brought their own curing traditions and combined salt, vinegar and spices with the practical necessity of preserving meat in a hot climate.
By the time of the great overland journeys of the 18th and 19th centuries, dried and cured meat was ideal travelling food. It required no refrigeration, was comparatively light, lasted far longer than fresh meat and provided concentrated protein on the road.
Coriander became one of biltong's defining flavours, alongside salt, pepper and vinegar.
The result was what we now know as biltong.
But strip away the name and the spice mixture and you arrive back at something wonderfully primitive:
A hunter preserving meat so it can feed him and his family another day.
That is probably why making it from an animal I've harvested myself feels so satisfying.
From the Farm
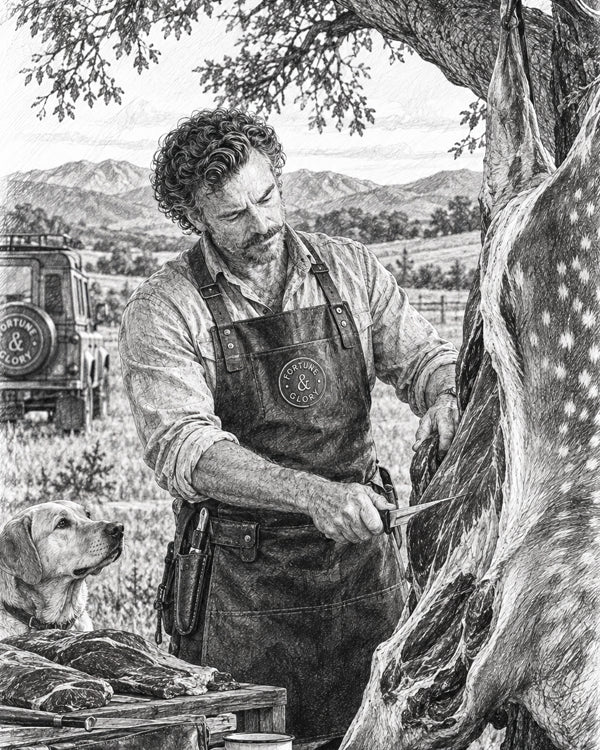
The fallow deer used for this batch came from a hunt on a local farm.
For me, the hunt doesn't finish when the animal is on the ground. In many respects, that's when the responsibility really begins.
An animal has been taken, and that creates an obligation to use it well.
We butcher our venison and make use of the different parts of the carcass rather than simply taking a couple of prime cuts and considering the job finished. The best cuts have their place at the family table; other good, lean meat can be turned into biltong and other meals, and the objective throughout is the same: make as much worthwhile use of the animal as possible.
Biltong is particularly well suited to the clean, lean meat of wild venison.
For this batch I used lean muscle from the hindquarter, carefully trimmed of silver skin, sinew and excess fat before cutting it into long strips.
And there is something particularly satisfying about the complete circle.
You hunt the animal. You butcher it. You prepare the meat. You preserve it. A few days later you're slicing your own biltong — and some of it inevitably ends up back in your pack on the next trip into the hills.
From bush to bag.
That, to me, is what fieldcraft is actually about.
Not simply owning the equipment, but knowing how to do useful things.
The Fortune & Glory Classic Biltong Recipe
There are hundreds of biltong recipes.
Ask ten South Africans how to make it and there's a reasonable chance you'll receive eleven answers.
Some use more vinegar. Some less. Some introduce Worcestershire sauce, chilli, garlic, brown sugar or other spices. Everyone has an opinion on how wet or dry the finished article should be.
This is our classic starting recipe.
And it is deliberately simple.
For every kilogram of meat, remember:
30 : 30 : 30 : 30
1 kg lean venison
30 g Himalayan pink salt
30 g coarsely cracked black pepper
30 g whole coriander seeds
30 g vinegar
For the vinegar, I like a combination of red wine vinegar and apple cider vinegar.
That's it.
Good meat. Four simple ingredients. Air. Time.
The Method
1. Prepare the Venison
Start with clean, lean venison that has been properly handled and chilled from the field.
Trim away silver skin, heavy sinew, bruised tissue and excess fat.
Biltong doesn't need to be paper thin. Cut the meat with the grain into long, fairly even strips approximately 20–30 mm thick.
Keeping the pieces reasonably consistent in thickness helps them dry at a similar rate.
Cutting with the grain is important because the finished biltong will eventually be sliced across the grain, giving you that characteristic biltong texture.
2. Toast the Coriander
Put the whole coriander seeds into a dry frying pan and gently toast them.
You aren't trying to burn them. You simply want to warm them sufficiently to release their oils and deepen the aroma.
Once toasted, roughly crush them.
Don't turn them into powder. I like plenty of recognisable cracked coriander remaining in the mixture.
That smell of freshly toasted coriander is, for me, the moment it starts smelling like biltong.
3. Add the Vinegar
Place the venison into a clean non-reactive tray or container.
Add your 30 g of vinegar per kilogram of meat, making sure the surfaces of the meat are thoroughly wetted.
I use a mixture of red wine vinegar and apple cider vinegar.
The vinegar contributes flavour and forms part of the curing process.
4. Season the Meat
For every kilogram of venison, add:
- 30 g Himalayan pink salt
- 30 g cracked black pepper
- 30 g toasted and crushed coriander seed
Work the seasoning over the meat so that every surface receives a good, even coating.
This is one of those jobs where your hands are generally the best tools you've got.
5. Marinate
Cover the meat and refrigerate it at 5°C or colder for at least 10 hours.
I generally find overnight convenient.
Don't leave the meat sitting around at room temperature while it cures. Treat it as the raw meat that it is and keep everything clean and cold.
6. Hang the Biltong
Remove the strips from the marinade and allow the excess liquid to drain.
Hang each strip individually inside a clean drying cabinet, ensuring that the pieces aren't touching one another.
Air needs to circulate around every surface.
You can buy a biltong dryer.
I built mine.
That's generally the Fortune & Glory approach to these things. If a useful piece of equipment can reasonably be made ourselves, I'd rather understand how it works and build it than simply buy another appliance.
The cabinet isn't complicated. What matters is clean, continuous airflow.
7. Dry It — Don't Cook It
Biltong is dried meat, not cooked meat.
You don't need to blast it with heat.
Gentle, continuous airflow gradually removes moisture from the meat. Exactly how long this takes will depend on the thickness of your strips, airflow, ambient temperature, humidity and — importantly — how you like your biltong.
Some people want a relatively moist centre.
Others want it considerably drier.
I prefer to judge the meat rather than blindly follow a number of days on a recipe.
The outside should become dark and firm. Check one of the thicker pieces to see how the centre is developing.
Patience is part of the process.
8. Slice It
When it's ready, take down a piece and slice it thinly across the grain.
That's the payoff.
Dark, concentrated venison. Cracked coriander. Pepper. Salt. The slight acidity from the vinegar.
Proper biltong made from an animal you harvested yourself.
It doesn't need much else.
Although a cold beer rarely hurts.
No Wild Venison? No Excuse.
You don't need to hunt to learn how to make biltong.
If wild venison isn't readily available, go and talk to a good butcher and ask for a lean piece of beef.
My first choice would be topside.
Silverside and eye of round are also excellent options.
Trim away excessive external fat, cut the beef with the grain into long strips and follow exactly the same basic method.
The important part isn't being able to say you hunted the animal.
The important part is learning the skill.
Start with the best meat you can get.
A Note on Food Safety
We are deliberately dealing with raw meat here, so cleanliness and temperature matter.
Use meat from a healthy animal that has been correctly field-dressed, handled and chilled. Keep your hands, knives, chopping boards, containers, hooks and drying equipment clean.
For every kilogram of meat, this recipe uses at least 30 g of salt and 30 g of vinegar, with all surfaces of the meat exposed to the marinade. Keep the meat at 5°C or colder while marinating and allow at least 10 hours before hanging.
Drying conditions matter as well. Biltong made at home should not automatically be assumed to be indefinitely shelf-stable simply because it looks dry.
If meat develops an unpleasant smell, sliminess, unusual discolouration or suspicious mould, don't try to rescue it.
Throw it away.
Why Make It Yourself?
Because you can buy biltong.
You can buy a drying cabinet.
You can buy meat already cut and prepared.
You can buy almost everything.
But convenience isn't always the point.
There is considerable satisfaction in knowing that the food in your pack began with an animal you harvested, butchered and prepared yourself.
It connects a series of useful skills that modern life has separated.
Hunt. Butcher. Preserve. Eat.
And even if you start with a piece of topside from your local butcher, you've still learned something worthwhile.
The next time you make it, you'll know more.
You'll change the thickness. Adjust the drying time. Experiment with the vinegar. Perhaps alter the spices.
And eventually you'll have your biltong recipe.
This one is simply where we suggest you begin.
More Biltong Is Coming
This is the classic Fortune & Glory biltong recipe, not the last word on the subject.
We'll be experimenting with different game meats, cuts, spice combinations and variations, and we'll publish the ones worth sharing on the Fortune & Glory website.
Alongside them you'll find our adventure stories, field guides and practical skills — the things we've learned, tried, built and occasionally got wrong along the way.
Because Fortune & Glory was never intended to be only about the gear.
It's about what you go and do with it.
Join the Field Journal
If you'd like to know when the next biltong recipe or field guide is published, join the Fortune & Glory Field Journal mailing list.
We'll send you notifications of new recipes, practical guides and adventure stories, along with new product releases and reader giveaways.
Learn the skill. Use what you take. Make it yourself.
Fortune & Glory — Gear for a Life Worth Living.
Wherever your next adventure takes you, remember there is always a place for you around the Fortune & Glory™ campfire.
Until next time.

Leave a comment
This site is protected by hCaptcha and the hCaptcha Privacy Policy and Terms of Service apply.